Basic equipment
The lecture halls of the School of Business Studies are located in building 21 in rooms 101 (lecture hall 1),
102 (lecture hall 2), 108 (lecture hall 3) and 109 (lecture hall 4).
All lecture halls have the following basic equipment (operating instructions):
- beamer
- fixed computer
- visualizer
- overhead projector
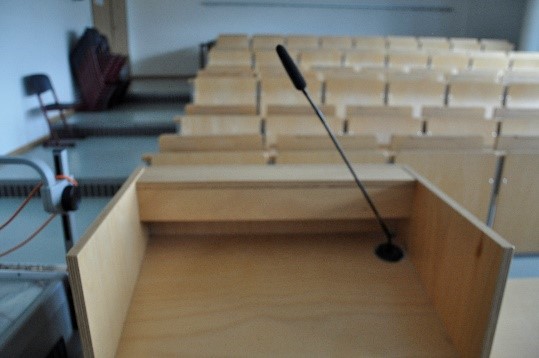
- lectern with desk microphone
- head microphone
- hand microphone
- chalkboards
- media interface for connecting external devices
Using the installed PC
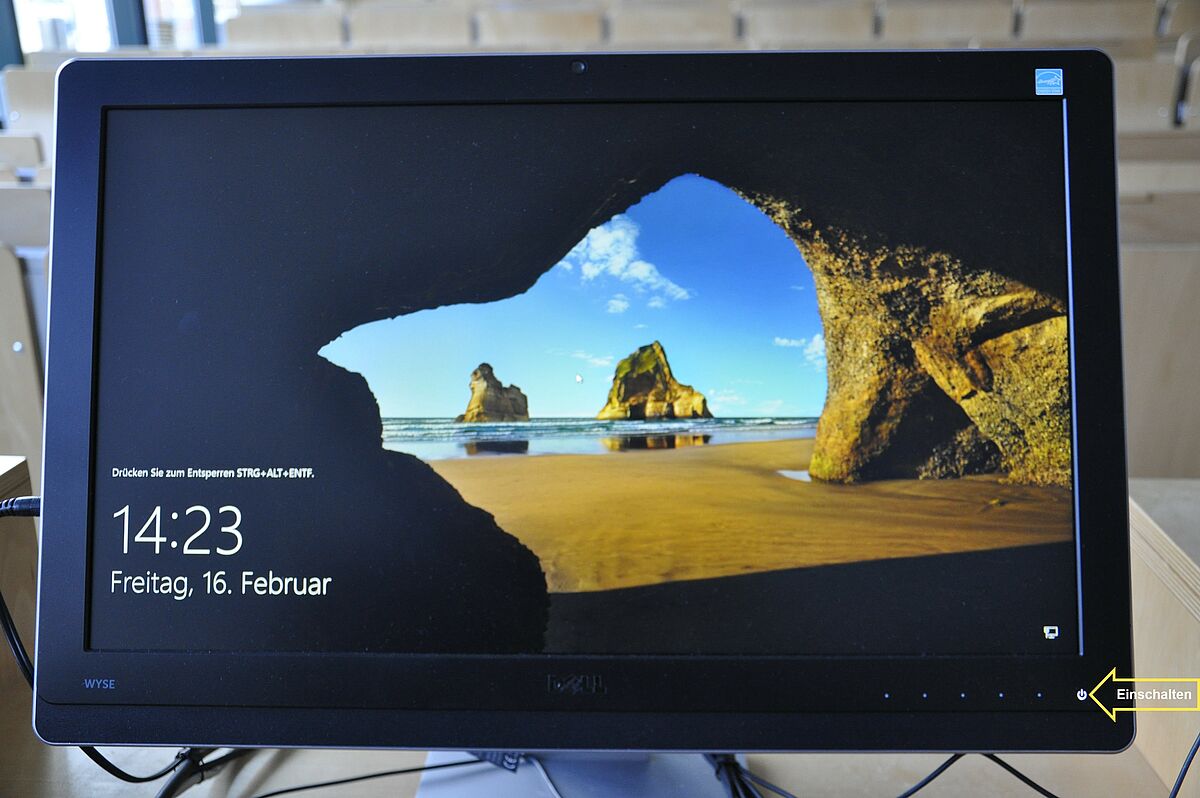
So-called thinclient computers are used in all lecture halls.
In the model used, the computer is integrated into the monitor. The device is switched on with the monitor's switch-on button. The computer boots up (starts a virtual machine) and provides the user with the login to the faculty network as usual. The login itself is done by entering the user name and the faculty password. Do not use the e-mail address or the email password! After logging in, all personal drives (home drive H:\, student drive S:\, project drives) are available. For guests, a login with ".\dozent" and the password "dozent" is possible (guest user). After work, the PC is shut down as usual. The thinclient then switches off. As before, no data is saved on the device, the system is reset after a restart.
Auditorium control system
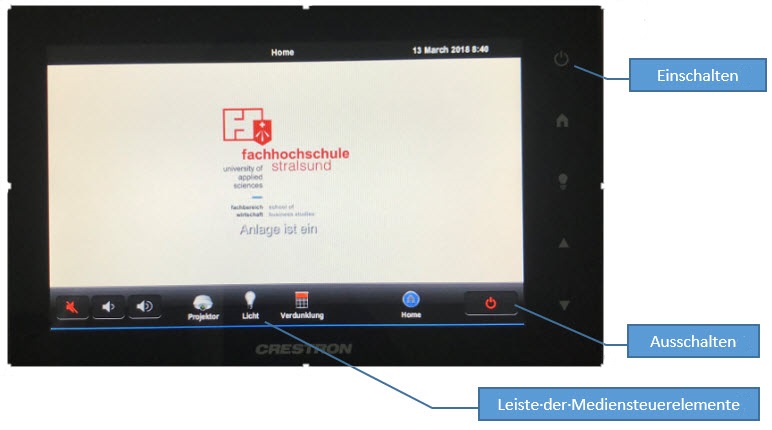
The core of the lecture hall control is the console, which is located on the table in each lecture hall.
The panel is operated via touch.
After longer periods of downtime, the system is started up by pressing the on/off symbol on the top right edge of the touch screen.
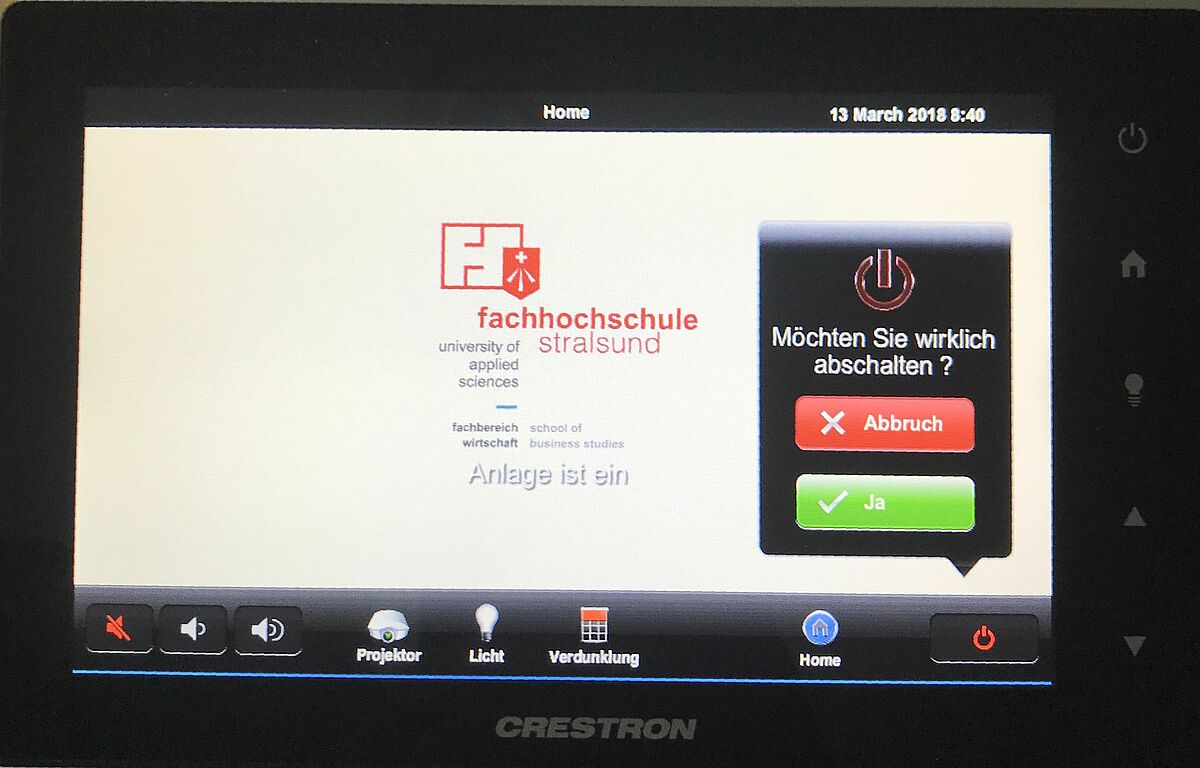
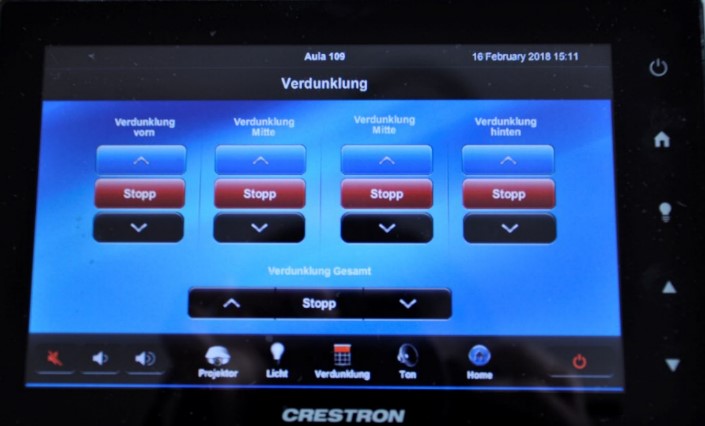
After finishing work, the system should be switched off. By pressing the corresponding button and confirming the safety query, the beamer is switched off, the dimming is raised and the system is returned to a neutral status.
Controlling the projector / selecting signal sources
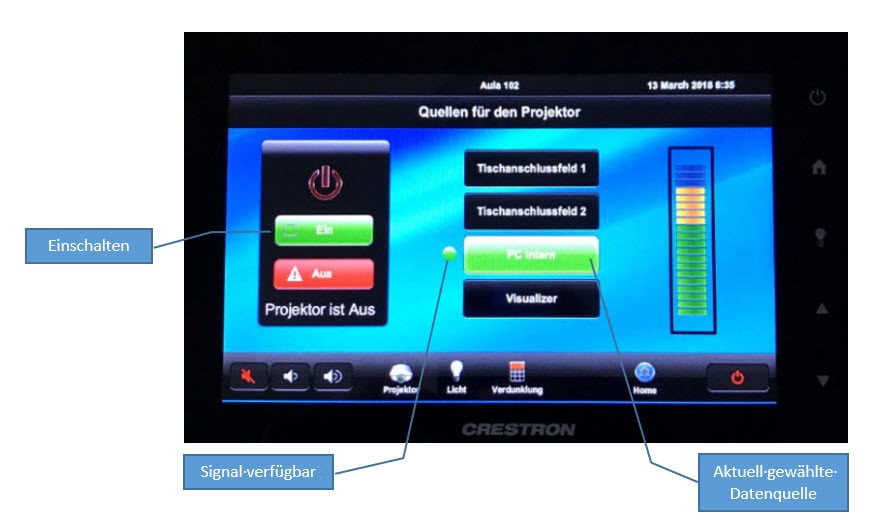
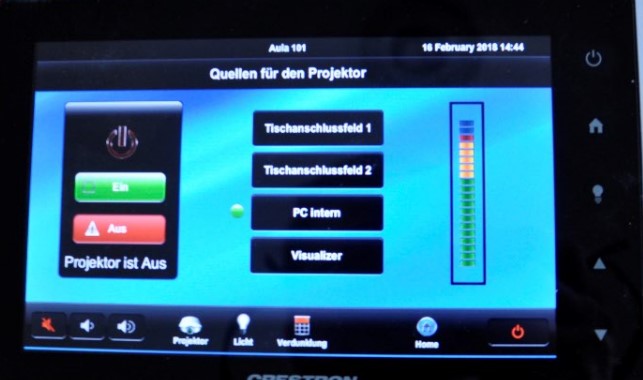
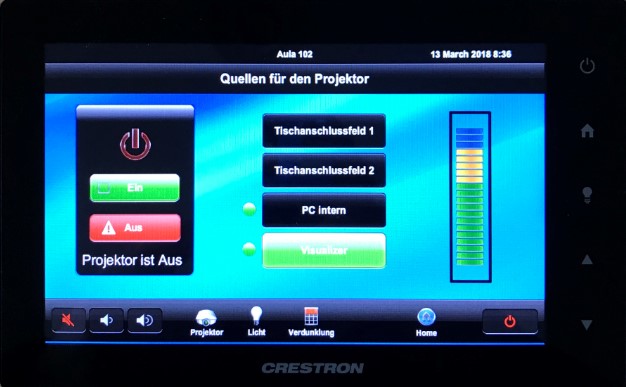
Pressing the "Projector" icon calls up the projector control.
- On the left side are the buttons for switching the projector on and off.
- In the middle, the available signal sources are marked by a green dot.
- ATTENTION! The green dot only indicates that a video signal exists at this source, it is not yet selected by the display of the green dot.
- On the right side (centre-right) are the buttons for selecting the signal source. By selecting a source, the selection is highlighted with a green background. Of course, only those sources can be displayed on the projector to which a signal is applied.
The projector is switched off by pressing the red "Off" button. Please note that the unit requires a follow-up time to cool down before it can be switched on again. There is also a delay before the projector is switched on. A period of 1-2 minutes may elapse before the first image is displayed. You will first recognise that the projector has been switched on successfully by the ventilation noise and the changed status display.
Controlling light
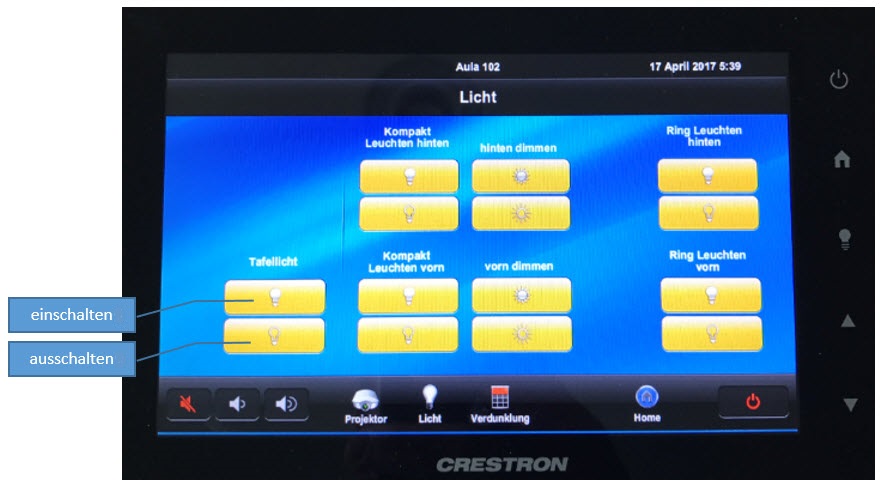
On the toolbar of the media to be controlled, there is also the symbol for the lamp control. In principle, the light can also be switched on and off manually via the switches located on the doors. However, the control via the touch panel of the media control allows a finer selection of the light sources, adapted to the respective lecture theatre.
Not all lecture halls display the complete selection on the first page! If further options exist, there is a "...more" button, which must then be selected.
Connecting external devices (laptops)
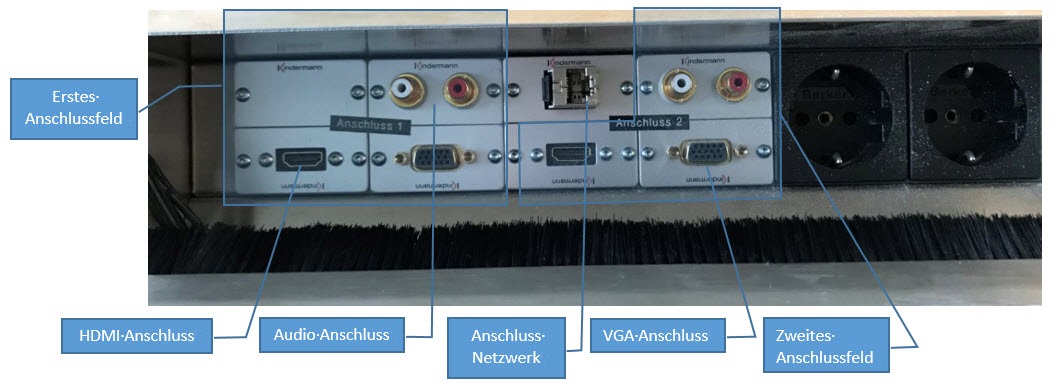
Each lecture hall has a connection panel for integrating external devices such as notebooks into the room's media technology. Up to two devices can be additionally connected in this way.
Both the HDMI and the VGA connection can be used for projecting the image onto the beamer. If both options are available, the HDMI connection is to be preferred. Playback of the audio signal is automatic. For the playback of the video signal on the beamer, the source may still have to be selected (see "Controlling the projector / Selecting signal sources"). If two units are connected, the display on the beamer can be switched by changing the signal source. If the internal PC is also used, up to 3 computers can be used simultaneously for the lecture in this way.
Using microphones
Three microphones are available in the lecture halls:
- The desk microphone
The desk microphone is permanently switched on. The distance to the speaker must be very small in order to avoid background noise.
- The hand-held microphone
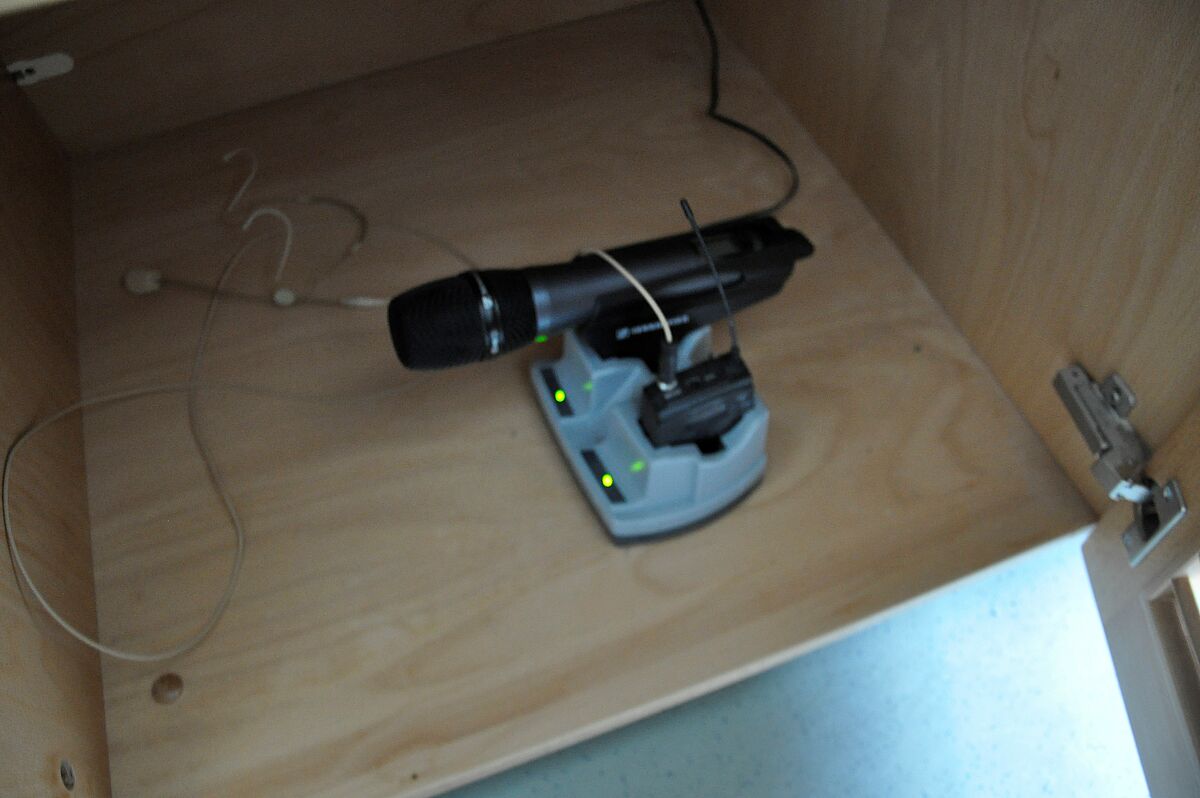
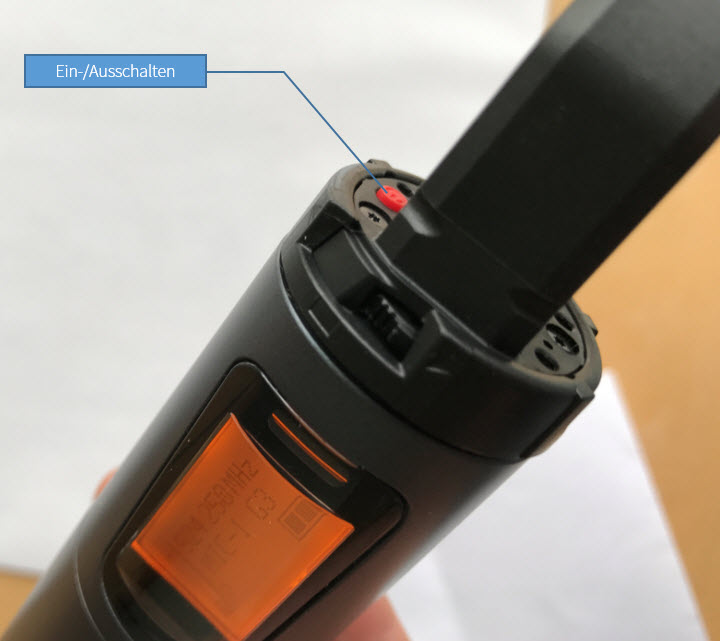
The handheld microphone is located together with the headset in a charging station in the first left-hand middle compartment of the lecture hall table. The glow of the green LED on the charging station indicates a fully charged device. To use the microphone, remove it from the charging station and switch it on using the red switch-on button located on the underside. A luminous display on the microphone signals that the unit is ready for operation.
- The headset
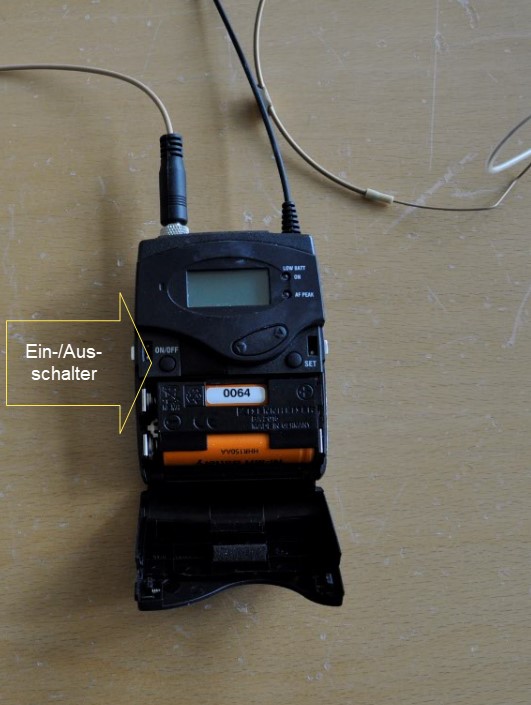
The headset is located next to the handheld microphone in the charging station. After removing it, the front flap must be opened.
On the left side there is a small button with which the unit is switched on or off.
A luminous display also indicates that the unit is ready for operation.
On the top of the unit is another button for muting the microphone. This should not be confused with the power button.
Volume control
In most lecture halls (except lecture hall 4), there is also a scale with the set volume in the projector setting menu. The volume can be adjusted here using the touch function or the arrow keys on the right edge. For an intelligible sound, it should always be set in the upper range but not completely full. With the crossed-out loudspeaker symbol in the lower left corner, it is possible to turn off the sound altogether or to turn it on again if necessary.
Visualizer
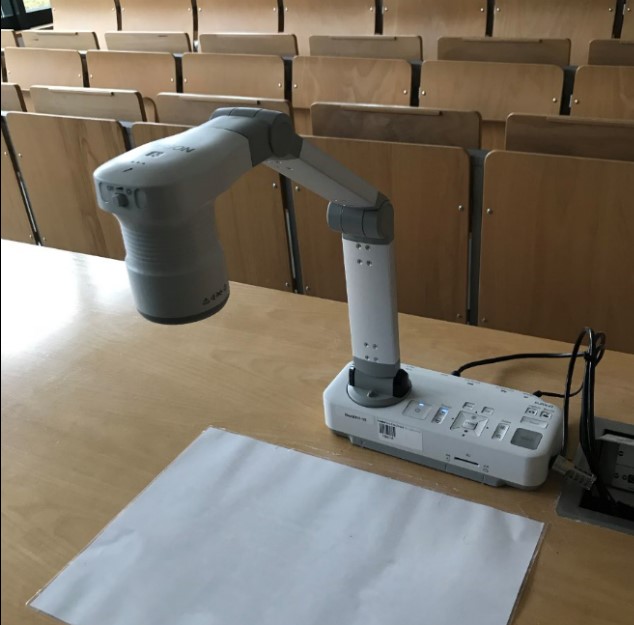
Visualizers are integrated in all lecture halls of the faculty. These devices reproduce everything under the camera on the beamer. It does not matter whether it is an overhead transparency, a written sheet of paper, a book or an object. This makes the Visualizers more versatile than the classic overhead projector.
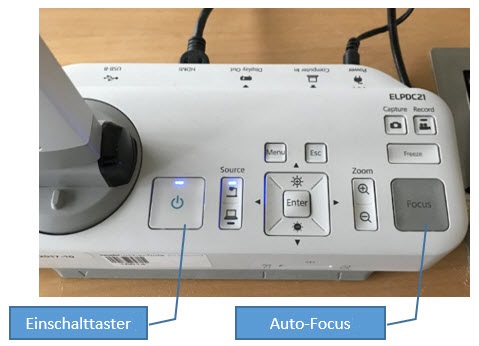
The operation is very simple. Switch on the unit with the power button, switch on the projector in the projector control and select the signal source "Visualizer". The Visualizer automatically selects the correct focus. If the result of the automatic adjustment does not meet your expectations, you can force another adjustment by pressing the "Focus" key. If the lighting conditions are not sufficient, additional lighting can be switched on via a switch on the camera head.
Attention! The Visualizer is switched off by pressing the power button twice.
Parallel operation of signal sources
If the PC is switched on at the same time as the Visualizer, two signal sources are available in the signal source selection (indicated by the green dot). By selecting the desired signal source, both systems can now be projected alternately with the projector. If an additional unit is connected to the table connection panel, there would even be another signal source available.
Basic equipment
The seminar rooms of the faculty are located in building 21 on the 1st floor, as well as in room 110 on the ground floor. The group work rooms 103 - 106 do not count as seminar rooms and are reserved for special tasks.
All seminar rooms have the following basic equipment:
- media presentation technology (beamer or displays)
- permanently installed computer with dual monitors
- visualizer
- height-adjustable lecturer's table
- HDMI interface for connecting external devices
- network connection for connecting external devices to the campus network
Operation of the interactive displays
The seminar rooms 201, 202, 203 are equipped with interactive displays. These displays replace the classic blackboard in the rooms and offer a variety of possibilities for presentation and interaction with the students (short instructions).
Switch on / Switch off
When switched on, the displays present themselves with a background image and an upper toolbar. In the waiting state, the displays are inactive; a motion sensor automatically switches the display on when there is activity in front of it. The devices can be switched on or off via a button below the lower right edge of the screen. If the display is to be switched off permanently, this button must be held down for a few seconds. A window appears with a confirmation prompt or the display switches off permanently after 10 seconds. Pressing the button briefly puts the unit into the waiting state.

